The difference between having the right tool for the job and the wrong tool is often the difference between getting the job done well and not getting it done at all. Even if you manage to get the wrong tool to work, the job often takes longer and produces shoddy results.
For just about any cooking situation, cast-iron cookware is the best tool for the job. You can use it on a stove-top, in an oven, over a fire, on coals, or with just about any other heat source. Properly maintained, it will last for generations. Even if it’s not been properly maintained, you can restore a cast-iron piece to working order without too much difficulty. And the best part of cast-iron is that the more you use it, the better it gets.
Some of the benefits of cast-iron include:
Extreme durability
High heat retention and inertia
Even heating across surface
Ability to withstand high temperatures
Non-stick surface (if properly maintained)
Increased dietary iron intake
Completely non-toxic
Unparalleled versatility
The non-stick properties of cast-iron are particularly remarkable. This is a selfie that I took off of the bottom of my cast-iron pan shortly after cooking with it. After rinsing off the excess food with water and seasoning it with a touch of olive oil, it’s as shiny and clean as a mirror—literally! The reflection is so good, I could use it to shave.
In my experience, cast-iron has a far better cooking surface than teflon or any other supposedly non-stick piece of cookware. When I fry up hash browns in my cast-iron pan, I can let the potatoes turn brown and crispy and still have virtually no problems lifting them off. With teflon, I get a giant mass of burnt starch all over the bottom. And I have never had any problems with eggs sticking to my pan at all.
Teflon pans are not nearly as durable as cast-iron. In just a year or two, the teflon begins to peel off and get into your food. That stuff is nasty—I certainly wouldn’t want to eat it.
In contrast, the only thing from a cast-iron pan that will get into your food is iron, which your body needs anyway. It’s safe to say that if you cook regularly with cast-iron, you will never be anemic. Also, cast-iron is durable enough that it will probably outlive you—no need to buy a new pan every few years. Investing in cast-iron is an excellent step towards self-sufficiency.
What are the disadvantages of cast-iron? Honestly, I can’t think of many, and when you dig down a little deeper, they aren’t disadvantages at all. The big ones include:
Cast-iron is heavier and more difficult to handle.
Proper seasoning requires large amounts of fats and oils.
It’s inconvenient to properly maintain.
The first point is undeniable. Cast-iron is heavy, and there’s no way to get around that. This is the main reason why my mom switched away from cast-iron and gave me the old family pan (thanks Mom!). But even though it’s heavy, it’s not impossibly heavy. I would chalk it up as a minor inconvenience, not a serious drawback.
The second point is also undeniable, though whether or not it’s a drawback is open to debate. I’m not a trained nutritionist, but there’s a lot of evidence coming out nowadays that our cultural obsession with low-fat diets is actually quite unhealthy. Our ancestors ate a lot more fat and a lot less sugar than we do, and on the whole it seems that they were much, much healthier.
In my own personal experiments, I’ve found that when I eat more fats (butter, lard, olive oil, bacon grease, etc), I tend to eat less, stay full longer, have more energy, and lose weight. Just now, I cooked up two strips of bacon and made an omelette in the grease. The meal was high in fat, but it had no added sugars, and in my own personal experience, that’s the important point. Ever since I made a conscious effort to replace the added sugars in my diet with fats, my health and fitness have improved.
So yes, you will have to use large amounts of fats and oils to properly season a cast-iron pan. If you’ve been eating a low-fat diet all your life, this may make you a bit squeamish. But is it unhealthy for you? In my experience, no.
The last point is just plain stupid. Yes, it takes a little bit of effort to properly maintain a cast-iron pan. So what? It takes a lot of effort to write a book, but that’s no reason not to do it. And believe me, it’s much, much easier to maintain a cast-iron pan than it is to write a book—even a bad one.
Seasoning
The most important part of maintaining a cast-iron pan is to keep it properly seasoned. An unseasoned pan will rust when it makes contact with water, since that’s what happens when you mix iron with water and oxygen. Seasoning produces a thin layer of oil over the surface of the iron, which repels the water and keeps it from getting in (kind of like the oil on your skin).
You season a pan by heating it and applying some sort of fat or oil. The heat causes the iron to expand slightly, widening the pores. When the iron cools and contracts, the lipid strands get caught in the pores. Thus, you get a thin layer of oil attached to the surface of the pan.
I’ve read all sorts of stuff on the internet about how to season cast-iron and which kinds of oils to use. Most of these sites recommend coating the cast-iron in oil and putting it in a preheated oven for several hours. With my pan, though, I never did that—after cleaning off the rust and scrubbing it thoroughly with salt, I simply started cooking with it.
The truth is that seasoning your pan is a continuous process, not a one-time event. Every time you cook, you should wipe it down with a little bit of oil or fat, and wait until the pan is fully heated before you begin to cook your food. I usually heat the pan up a little warmer than what I’m going to need, apply the oil, then turn down the heat and wait a couple of minutes before I start cooking. Using this method, I haven’t had any problems.
When you cook, a small amount of the seasoning layer comes off and gets into your food. This is normal and healthy. A little bit of iron flakes off with it, which is also healthy. Over time, this causes the bottom of the pan to become smoother, improving the quality of the pan. So the more you cook with your cast-iron pan, the better it gets.
Washing
Some cast-iron aficionados never wash their pans, ever. They prefer to cook with dirty pans, claiming that it “adds flavor.” Personally, I think that’s gross. I don’t always wash my pan, but if I’m going to make something like bacon and eggs after cooking stir-fry, I definitely wash it first.
The most important thing to remember when washing cast iron is to avoid using soap. The problem with soap is that it removes oil, so scrubbing your pan with soap will remove the layer of seasoning that protects your pan from rust. Some people say it’s okay to use dish soap if you wipe it down with oil after you dry it, but I’d rather not risk it.
If your pan is properly seasoned, you probably won’t have to use soap anyway. I’ve only ever used warm water and a rag, and it always cleans things up nicely.
The other thing you want to be careful about when washing is temperature shock. If you add water while the pan is still hot, it will put out a lot of steam and briefly cause the water to boil. This can make it easier to clean, but it also makes the iron contract rapidly, which may cause it to crack. For that reason, never use cold water on a hot pan: always use warm or hot water.
Metal Cookware
The last big thing to remember with cast-iron is to never use plastic cookware. Plastic melts, and because iron is porous, that plastic will get into your pan and into your food. I’ve also noticed that plastic will melt on other pans, which is really kind of gross and makes it a bad idea to use plastic cookware in general. But with cast-iron in particular, there’s simply no need.
The reason we use plastic cookware nowadays is because metal cookware damages teflon. But with cast-iron, that isn’t a problem. No matter how hard you scrape your cast-iron pan with a stainless steel spatula, you will destroy the spatula long before you cause any damage to your pan.
In short, cast-iron is amazing. It requires learning some new habits and possibly making a few lifestyle adjustments, but the benefits are totally worth it. If you want to become more self-sufficient, investing in cast-iron is an excellent step to take.
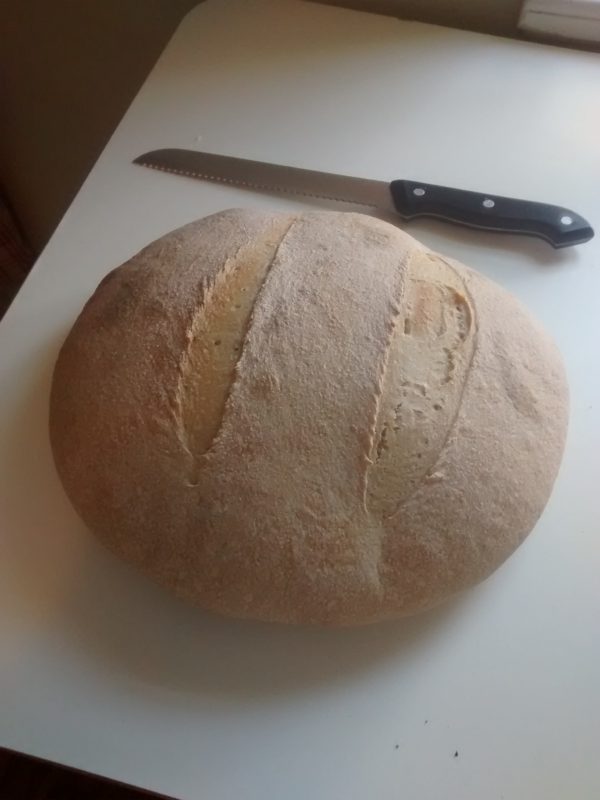
My first batch of homemade bread. It’s improved significantly since then!
Bread may not be the staple food in every culture, but it certainly is in mine. So when I decided I was going to become more self-sufficient, learning how to make quality bread from scratch was very high up on the priority list.
Bread is awesome for a number of reasons. It’s nutritious and healthy, comes in a variety of different styles and flavors, is relatively easy to make, and is made from ingredients that are cheap and easy to acquire.
Of course, some breads are better than others. Most of the criticism about bread being fattening and unhealthy are due to commercial breadmaking practices and can be totally reversed by making it yourself. People across the world have been eating bread for thousands of years; if it was fundamentally bad for us, we would have figured it out by now.
There is a huge difference between the modern commercial bread in the typical American grocery store and bread made by more traditional methods. I noticed this difference when I came back from living overseas. In Georgia, easily 40% of my diet was bread of some sort, so one of the first foods I bought on my return was a freshly made loaf from the local Smith’s grocery store. It was like eating air. Not only did the bread lack flavor, but it was remarkably unfilling compared to the stuff I’d become accustomed to.
Fortunately, after learning how to grind wheat, I was able to make bread that was just as good—in fact, probably better. Every Sunday, I bake a couple of loaves, freezing one for later (bread freezes extremely well) and using the other immediately. I’ve been baking bread on a regular basis for the last six months, and while I still have a lot to learn, there’s a lot that I can share.
So let’s start with the basic ingredients:
FLOUR
Flour is made from grain that has been ground to a powder. The typical grain for bread is wheat, though you can also make bread from rye, oats, rice, and other kinds of grains.
Source: Wikipedia CC BY-SA 3.0
A wheat kernal consists of three parts: bran, germ, and endosperm. Each one is perfectly edible. The bran is the outer shell, the germ is the embryo, and the endosperm is a nutritional package for the plant. If you compare it to a spaceship, the bran is like the hull, the germ is like the living quarters for the crew, and the endosperm is like the rocket fuel.
Whole wheat flour has the germ and the bran, but in white or all-purpose flour, those have been removed. Since the endosperm has very little fiber and is almost all carbs, bread made from this kind of flour is significantly less healthy and less filling. However, all-purpose flour tends to make bread sweeter (again, because of the carbs), so it’s okay to mix a little of it into your dough. But I wouldn’t want to eat a loaf made entirely from all-purpose flour.
When stored in proper conditions, whole wheat will last basically forever. To return to the spaceship analogy, each grain of wheat is like a tiny colony ship with the colonists frozen in cryo, just waiting to arrive at their new homeworld. As long as the hull doesn’t breach, everything’s pretty much good.
For this reason, wheat is perfect for long-term food storage. All you need is some way to grind it into flour, which you can then use to make bread at your leisure. The grinder I use is an old Magic Mill Plus III that I inherited from my parents. The thing is older than I am and sounds like a freaking jet engine when it’s running, but it gets the job done (some day, I’m going to build a pedal-powered wheat grinder that you can hook up to your bicycle, but that’ll deserve a whole post unto itself).
There are a lot of different varieties of whole wheat, but for our purposes, there are basically two:
Red wheat is denser and more flavorful, with a strong, hearty flavor.
White wheat is softer and lighter, with a less overpowering flavor.
There are other distinctions, such as hard wheat vs. soft wheat, winter wheat vs. spring wheat, etc, but I haven’t experienced any significant difference between those. The main distinctions I’ve found to be significant have been between whole red wheat, whole white wheat, and all-purpose flour.
WATER
Next to wheat, water is the most significant ingredient in the bread making process. It is entirely possible to make edible, nutritious bread from nothing but flour and water (including leavened bread, but more on that later).
To make good bread, it’s important to have the right consistency of moisture. Dough that is too dry will make a hard, dense bread that dries out and goes stale very quickly. Dough that is too wet will not hold its shape very well, which isn’t much of a problem for sandwhich loaves but can be a problem for artisan bread. Generally, though, it’s best to err on the wet side.
Dough that is the right consistency will be sticky, but not too sticky. Basically, it will cling to your hands and the table but not so much to make them super messy. Most homemaking blogs describe this consistency as “silky,” which makes no sense to me, since I have no desire to either eat silk or wear bread dough. Then again, I’m a man.
In order to preserve moisture, it is entirely possible to knead with water instead of flour. I picked up this technique from Melissa Richardson of The Bread Geek (and author of The Art of Baking with Natural Yeast, which I highly recommend). You basically wet your hands, run them over the dough, and knead as per usual. The water forms a lubricating layer which prevents the dough from sticking to your hands or the table. Just be sure not to let the dough sit for too long on the table, because it will start to stick.
YEAST
Leavening is the process by which little air bubbles are injected into the dough, making it light and spongey. If you don’t use a leavening agent of some kind, you’ll end up with crackers instead of bread (or worse, a solid brick). While it’s possible to leaven bread with baking powder or baking soda, the most common leavening agent is yeast.
Yeast is a single-celled fungi that turns sugars into ethanol and carbon dioxide through a process known as fermentation. When brewing alcohol, the ethanol mixes into the drink and the carbon dioxide dissipates into the air. When baking bread, the carbon dioxide is trapped in the dough to form air bubbles and the ethanol dissipates in the baking process.
This is where things get interesting. If you’re like me when I first started baking bread, you probably think of yeast as a packet of powdery brown stuff that you buy at the grocery store. But people have been baking bread for thousands of years. Where did they get their yeast before they had those little packets? And how can we be truly self-sufficient if we have to go to the grocery store every couple of months to get our yeast?
Commercial quick rising yeasts are a relatively new invention. The yeast you buy in the grocery store is a single isolated variety produced in a laboratory and optimized for just one thing: making bread rise quickly. But before commercial yeast, people used yeasts that they cultivated themselves—and these traditional yeast cultures do much, much more.
In a natural yeast culture, multiple varieties of yeast coexist symbiotically with a probiotic known as lactobaccilus. The lactobaccili promotes a mildly acidic environment which keeps out mold and allows the yeast to thrive. This environment also simulates the soil, neutralizing phytic acids in the wheat that bind up most of the nutrients—essentially tricking the wheat into thinking that it’s been planted. In addition, the yeast consumes many of the sugars that give the bread such a high glycemic index, and partially digests the gluten to make it more digestible for humans.
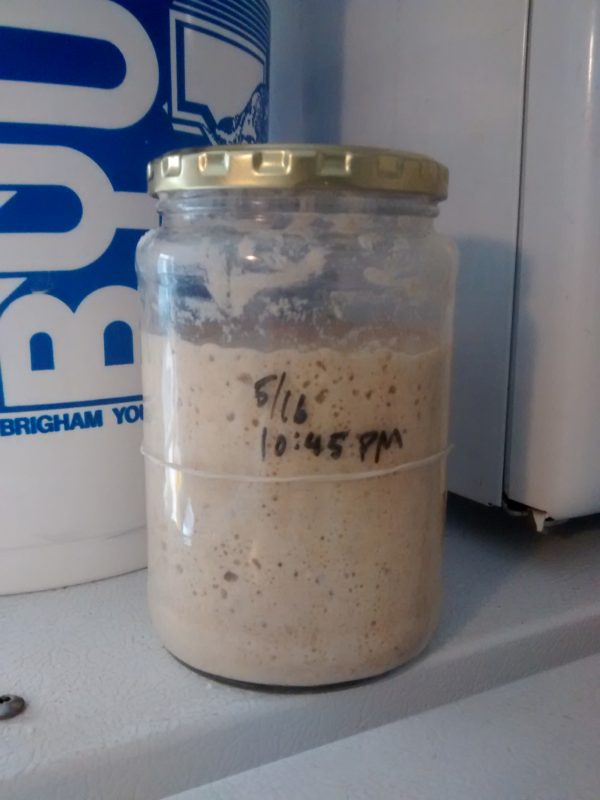
My sourdough starter which I made from whole white wheat and all-purpose flour. The rubber band represents the level that it started at, and the timestamp shows when it was last fed.
This natural yeast, also known as sourdough starter, makes for a bread that is healthier, tastier, more nutritious, and much more self-sufficient. You can use it to make almost any kind of bread, including breads that are mild and not sour. And to make your own culture, all you need is flour and water.
Wait—all you need is flour and water? But where does the yeast come from?
The thing about yeast is that it’s everywhere: in the air, on your skin, and on the skins of fruits and grains. The type of yeast that’s best for fermenting any kind of plant can typically be found on that plant. Thus, to make wine, you crush grapes and yet the yeast on the skin of the grapes ferment the juice. For bread, you essentially do the same thing: use the yeast found on the outside of the grain to ferment the dough you make from it.
To make your own sourdough starter, it’s best to start with whole wheat or rye flour, since those contain more yeasts. After that, you can also use all-purpose flour so long as it’s unbleached. Since chlorine can also kill yeast, it’s important to use water that isn’t chlorinated. You can do this either by buying bottled mineral water, or by letting a pitcher of tap water sit on the counter for at least 24 hours to let the chlorine dissipate.
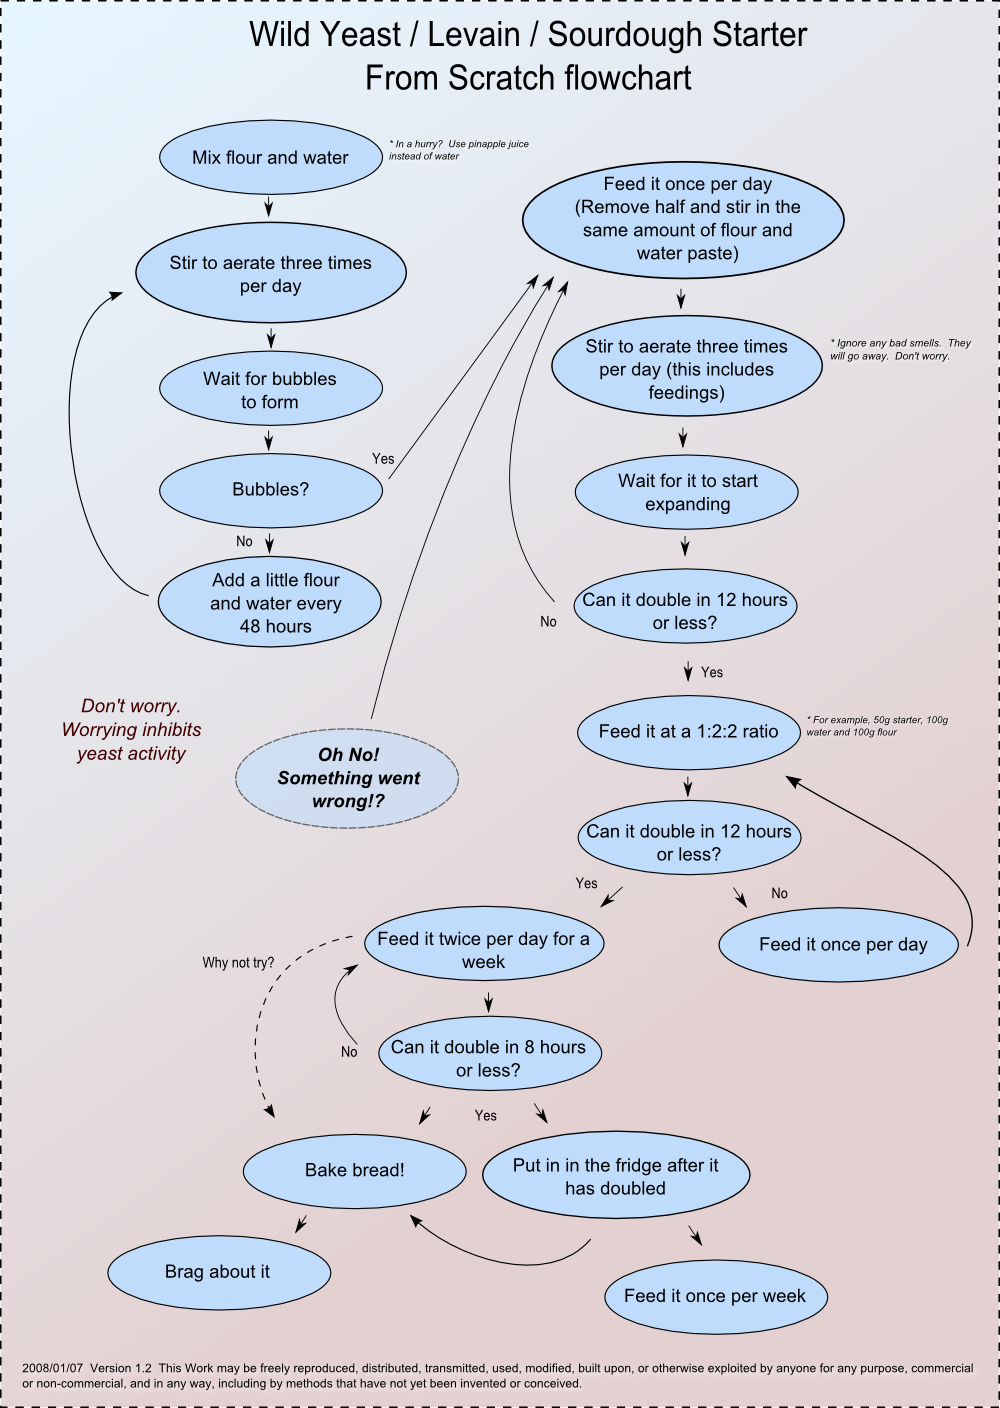
If you want to make your own sourdough starter, this chart shows the way to do it. For my starter, I just mixed flour, water, and starter at a 1:1:1 ratio every 24 hours, and at the end of the week, it was doubling in less than 8 hours. I’ve been baking bread with it ever since.
Sourdough starter can be kept on the counter at room temperature or in the fridge. A healthy culture will maintain itself, so as long as you feed it regularly, it shouldn’t go bad. Even if you neglect it for long periods of time, you may still be able to revive it. The only sure thing that will kill yeast is an oven, which is why in Alaska they call you a “sourdough” if you’ve lived there for at least a year.
Every starter culture has its own idiosyncracies, so you’ll have to play around with your own to get a feel for it. In general, though, sourdough starter follows this life cycle:
STAGE 0: Yeast has not yet consumed the flour. Bubbles are starting to form but dough has not yet doubled in size. Time on counter: 0-4 hours. Time in fridge: 0-1 days.
STAGE 1: Yeast population multiplies exponentially, overtaking the bacteria. Dough doubles in size and has a mild taste. Time on counter: 4-8 hours. Time in fridge: 1-3 days.
STAGE 2: Yeast population stabilizes and bacteria population begins to overtake it. Sourness increases by the hour. Time on counter: 8-24 hours. Time in fridge: 3-7 days.
STAGE 3: Yeast begins to starve. A layer of clear alcoholic liquid, known as hooch, appears on surface. Bacteria surpasses yeast and makes dough too sour to be usable. Time on counter: 24+ hours. Time in fridge: 7+ days.
The key ingredient with sourdough starter is time. To make a milder tasting bread, shape the loaves immediately after kneading and let rise only 4-6 hours (or until they just double in size). To make a more sour tasting bread, let the dough rise longer.
It is entirely possible to make good, nutritious bread from nothing but flour and water (in fact, that is how most artisan breads are made). However, you will probably want to add more ingredients in order to improve the taste and texture. Here are some of the other common ingredients that can go into bread.
SALT
Salt is a flavor enhancer: it basically amplifies whatever flavors are already in your bread. It also kills yeast, however, so adding too much will make it harder for your bread to rise. Most bread recipes typically call for no more than a teaspoon.
SUGAR
Sugar makes bread sweeter and can make the yeast grow faster. It also helps the bread retain moisture. When I bake bread, I typically use about half a cup of white or brown sugar for two loaves.
I have read somewhere that with sourdough starter, sugar is completely consumed by the yeast and does not of itself make the bread any sweeter. I have not found that to be the case. My first test loaf with sourdough starter was made without any sugar, and the second test loaf was. The first loaf was too sour, but the second one was sweeter and more palatable. If the sugar had been completely consumed, the second loaf should have been more sour because it would have accelerated the yeast’s life cycle.
The yeast in a sourdough culture is optimized to eat whatever it is that you feed it most regularly. If you feed it mostly flour, then it will be optimized to eat flour, not sugar. If you switch to feeding it rye, then the rye-consuming yeasts will overtake the wheat-consuming yeasts and over time your starter will be optimized for rye. This is why it’s kind of pointless to make sourdough starter from grapes or raisins. The yeast on grapes is not optimized for flour, and will be overtaken anyway once you start feeding it flour, so you might as well just use the flour to begin with.
Bottom line, sugar makes bread sweeter.
MILK
In most bread recipes, you can substitute a portion of the water for milk. This will make the bread softer and lighter, just like adding milk to an omelette will make it softer and lighter.
You can also glaze the top of your bread with milk immediately before you bake it. This will make the crust darker and give it more flavor. You can use other things to glaze your bread, but I prefer milk because it browns the crust only slightly without making it too thick.
EGGS
In generally, eggs help baked goods to hold together better. If you’re having problems with your bread getting too crumbly or falling apart, one way to solve that would be to add an egg.
Like milk, eggs can also be used for glazing. The yolks thicken the crust and give it a golden color, while the whites give it a shiny sheen.
BUTTER/OIL
Fats and oils lubricate the gluten in bread, making for shorter gluten chains (hence the word “shortening”). In practice, this means that bread made with oils or fats will be softer and lighter, with smaller, more uniform air bubbles. Breads made without fat, such as French bread, will be tougher and chewier with large air bubbles. Use enough fat, and you’ll end up with cake instead of bread.
Butter is a special case because its melting point is roughly body temperature. This means that butter enhances texture, since it melts in your mouth when you eat it. Butter can also be used to glaze your bread both before and after baking. For that reason, butter is the most convenient way to glaze bread.
For sandwich loaves, I prefer to use olive oil because of the flavor it imparts. Olive oil has a very distinctive flavor that translates quite nicely into finished bread. It’s more of a savory flavor, though, so for sweet breads, I prefer to use butter.
I try to avoid unnatural oils like margarine, shortening, and vegetable oil. I don’t have any proof that they’re bad for you, but I just don’t trust them. Besides, they don’t taste nearly as good as natural fats like butter, lard, and olive oil.
So much for the ingredients. Now let’s move on to the basic breadmaking techniques:
SIFTING
When flour sits in a container for a long time, it tends to settle and become dense. Sifting helps to lighten the flour by mixing air in with it, making it easier for the flour to mix with other ingredients.
An easy way to sift your flour is to mix all your dry ingredients in a separate bowl from the wet ingredients and mix it all together with your hand. Get a feel for the flour and stir it until it’s at the consistency that you want.
If you do not sift your flour before mixing it with the wet ingredients, your bread will be denser and less uniform. So sifting is definitely a good idea.
KNEADING
Kneading is a process of stretching and folding that gives bread its texture. It takes a lot of effort to do it by hand, but it’s worth it, since bread that isn’t kneaded properly will crumble and fall apart.
Gluten forms when glutenin and gliadin proteins in the flour cross each other, forming long chains. These gluten chains form the matrix that traps the air bubbles and allows the bread to rise. Longer chains can trap more air and hold your bread together, making it stronger and less crumbly.
The way to know when your dough has been kneaded enough is to run it through the windowpane test. Stretch a small bit of dough between your fingers and see how thin you can stretch it before it breaks. If you can stretch it thin enough to see light through the other side, your dough has been kneaded enough.
If you’re kneading by hand, it’s almost impossible to overdo it, so I knead all my dough for at least ten minutes. After a while, you get a pretty good feel for it, so that you can tell when the dough is ready just by handling it.
SHAPING
Shaping loaves can be tricky. If you’re not careful, you can end up with massive pockets of air inside your loaf. It can be a real pain.
I used to shape my loaves by flattening the dough out and rolling it up, but I ended up with some massive pockets that way, so I don’t do it that way anymore. Instead, I form a ball with the dough and roll it around for a minute or two to make sure that it’s uniform. Then, I stretch the edges of the ball out and roll it lengthwise to give it the proper shape.
Artisinal breads call for different shaping techniques. They may also call for scoring the surface of the bread immediately before baking. Since yeast multiplies rapidly just before it dies, bread tends to expand in the first few minutes of the baking process. Scoring it helps to control where it expands, so that you don’t get a misshapen loaf.
BAKING
The baking process is pretty straightforward: set your oven to a certain temperature and put the bread in the oven for a set amount of time. Different recipes call for different times and temperatures, though, so its important to pay attention to that.
I’ve found that most breads do well at 350° F for 30-35 minutes. Flatbreads such as pita need a much shorter baking time as well as a higher temperature, since they aren’t nearly as thick and have a larger evaporative surface. Some breads like scones, tortillas, and English muffins are made on a stovetop and not an oven. However, the same general rules apply: thicker breads need to cook longer at lower temperatures than thinner flatbreads.
To make bread with a thick crust, add an oven-safe bowl or container with a couple of inches of water inside of it. This generates steam inside your oven, which significantly boosts the crust.
It’s also important to allow your bread time to cool off before you cut into it. This is because the steam inside of the bread still bakes it after you’ve removed it from the oven. Cutting into a loaf of bread too soon will make the inside sticky, and cause it to dry out faster.
My first loaf of San Francisco sourdough bread. This stuff tastes fantastic!
That is pretty much everything I know about making bread. There’s a bit of a learning curve, but it is definitely worth it.
Learning how to bake my own bread allowed me to cut my monthly food budget by at least 25%. Wheat is incredibly cheap (only $7 for 25 lbs at the LDS Home Storage Center—that’s enough to last me about three or four months), and whole wheat bread is significantly more filling than the white stuff. Also, the taste of homemade bread is AMAZING. I cannot go back to the bread in the store—the homemade stuff is just too good.
Better, healthier, more filling food at a fraction of the cost—that’s what it means to be self-sufficient with bread. I’ll leave you with my basic recipe:
BASIC WHOLE WHEAT BREAD
2-3 cups sourdough starter
2-3 cups warm water
.5 cup sugar
.25 cup olive oil
3-4 cups white wheat flour
3-4 cups red wheat flour
.5 tbsp salt
Sift 6 cups flour and salt in a large mixing bowl. Leave some flour aside for kneading.
Mix starter, water, sugar, and oil. Add to dry ingredients to form dough.
Knead for at least ten minutes, adding flour until consistency is slightly sticky.
Shape loaves and place in greased bread pans. Allow 4-8 hours to rise.
Bake at 350° F for 35 minutes. Glaze with butter and set aside to cool.
For mild bread, bake as soon as loaves double in size. For sour bread, allow more rise time.
Before I go on with this series, I feel I should take a step back and discuss the topic of lifestyle choices.
The Merriam-Webster dictionary defines lifestyle as “the typical way of life of an individual, group, or culture.” According to Wikipedia, this includes “interests, opinions, behaviors, and behavioral orientations,” and is constrained by things like demographic background, personal values, preferences, and outlooks.
In other words, your lifestyle is the way you choose to live your life within the constraints of your own circumstances. Some circumstances can be more constraining than others, but still, lifestyle is fundamentally a choice. Even in abject poverty, there are people who choose to live differently than others.
So what sort of constraints does a writing career place on your lifestyle? Well, let’s talk shop for a minute.
If you’re a writer, you’re going to need the tools of the trade. Today, that normally means a computer with a word processor, though you can also use a typewriter or pen and paper. If you have a publisher, you’re going to need some way to contact them, either by snail mail or email. If you are your own publisher, you’ll need an internet connection, a bank account, and a computer with basic formatting and image editing software (Calibre, Gimp, Blender, etc).
In other words, all you really need to be a professional writer is a computer, an internet connection, and a bank account. You may need more depending on what you’re writing and who you’re writing it for, but those are the basic tools.
So what does this mean in terms of lifestyle choices? It means that writers have a lot of options. For most careers, your income earning potential gets lower the farther out you live from a large city. Not so for writing. You could actually live in rural Mongolia with nothing but a backpack and a horse, and so long as you can come into Ulaanbataar every couple of months and find an internet cafe, you can self-publish just like anyone else.
In other words, there is no “writing lifestyle.” There are only writers who have adapted their writing careers to the kind of life they want to live.
This makes it all the more important to consciously choose what sort of lifestyle you’re going to live, rather than letting circumstance choose it for you. If you don’t, it won’t be long before you find yourself in your underwear, eating nutella straight out of the jar, sitting in front of a grease-stained monitor clicking through an endless loop of Youtube videos. Just like no one is going to force you to meet your deadlines or write everyday, no one is going to force you to put your life in order.
Self-sufficiency is a lifestyle choice. It’s not a life hack, or a weird trick, or something you can learn in an afternoon. It takes work. It requires change. You will have to pay tuition by making mistakes along the way. And even though it can be fun, it can also be frustrating and painful.
When making a lifestyle change, it’s generally a good idea to take a step back first and figure out your goals and vision. By having a vision of what you want for your life, you’re much more likely to get there. This vision will be a reflection of your values and your deepest desires. Specific, measurable goals will help you to translate this vision into action, and provide the direction that you need to achieve your vision.
I have three main goals for the kind of lifestyle I hope to live. I haven’t achieved these goals yet, but I’m working toward them and hope to achieve them in the next three to five years.
Goal 1: Prepare my family well enough to survive any disaster and rebuild.
Emergency preparedness is a very important thing to me. It gives me both a sense of security and a sense of independence to know that if crap ever hits the fan, I won’t be a helpless victim.
Disasters come in a variety of flavors. There are natural disasters like hurricanes and earthquakes, man-made disasters like an economic collapse, and personal disasters like bankruptcy or the unexpected death of close family members. While it’s important to have contingency plans for each one, it’s also important to recognize that every plan falls apart upon contact with the enemy.
I plan to blog extensively about preparedness later on in this series. In the meantime, I’d recommend checking out Listening to Katrina for some very interesting perspectives on this subject. I learned a lot from reading that blog.
One of the most important things I learned is that prepping is about more than just surviving the disaster: it’s about surviving it well enough to rebuild. As much as I love reading post-apocalyptic stories, I don’t want to be stuck in a fallout shelter eating canned beans forever. We invented civilization for a reason, and if it ever falls, I want to be one of the guys who helps to rebuild it.
As a writer, I feel that emergency preparedness is even more important because the likelihood of facing a personal disaster is that much greater. If my writing career ever takes a wrong turn and falls out from under me, I want my family to be able to survive that long enough for me to successfully reinvent myself. According to Kristine Katherine Rusch, it’s common for working writers to face a major career crisis every ten to fifteen years or so, and I don’t think I’ll be an exception to that rule.
Goal 2: Develop a home economy that can provide for my family’s basic needs.
Most households in the United States produce consumer debt and not much else. If the US dollar became worthless and we all had to live off of what we had at home, within a couple of weeks, most of us would be screwed.
In a previous post, I talked a little bit about the concept of a home economy and how I experienced that concept while living overseas. It’s one of the things that I hope to implement once I have a family of my own. Instead of producing nothing but debt, I want my home economy to produce food, water, and even things like electricity and heating if it ever becomes necessary.
For me, one of the most important components of self-sufficiency is being able to produce most, if not all, of the food my family eats. Growing a garden, keeping chickens, baking bread, making cheese and yogurt—these are all things that I hope to do, and am working now to learn.
Two books that helped me get started on this path were The Forgotten Skills of Self-Sufficiency and More Forgotten Skills of Self-Sufficiency by Caleb Warnock. I’m also sharecropping this season with a local friend, building garden plots in his yard and growing cabbage, peas, radishes, broccoli, tomatoes, peppers, and zucchini. In a few weeks, we’ll build a chicken coop and get some bantams, which should make for an interesting blog post.
The goal here is not to become 100% self-sufficient in absolutely everything, but to produce enough that we can barter for the things we can’t produce on our own. For example, I don’t expect to ever own my own cow, but I do want to produce enough of a surplus of other things that I could barter with someone who does. Also, while I might not own the cow that produces the milk, I do want to have the capacity to turn that milk into things like cheese and yogurt.
This goal also encompasses being able to live off-grid. At some point, I’d like to switch to solar and become energy self-sufficient. Here in Utah, it’s legal to own and operate your own solar panels, so long as you don’t sell back so much energy to the grid that your electricity bill becomes negative. In other states, though, you have to lease your roof to a third party that technically owns the panels. I’m still learning up on all that, so I’ll probably invite a friend who knows more than me to come on with a guest post.
Goal 3: Make my home a refuge from the world where my family can feel close to God at all times.
This is the most important thing, and the one that will probably make everything else come together. Wherever I live, I want it to actually feel like a home, not just the place I live. I want it to be a safe zone for everyone in my family—a place apart from all of the bad things happening elsewhere. Most importantly, I want it to be a place of love where we can all feel close to God.
I grew up in a home that was very much like this, so for a large part of my life, it’s something that I’ve taken for granted. Having lived on my own for more than a decade and moved on average two or three times each year, I know that it’s something you’ve got to work towards.
Homemaking is often considered to be a womanly thing, but that’s exactly what this goal encompasses. At some point, I’d like to have a woman in my life who could help out with that aspect, but it’s something that I’m sure we’ll both be working on together. In the meantime, I have a sister whose brain I can rack whenever I have a question on the subject.
So that is the kind of self-sufficient lifestyle that I personally want to live. As you can probably tell, family is one of the main themes running through everything. I’m single right now, but I do want to have a family of my own and that’s what I’m working towards.
And while my writing career isn’t explicitly mentioned in any of those goals, it’s definitely wrapped up in all of them. As a writer, my income earning potential is not dependent on how close I live to a major city. That means I can live a little farther out in the country, where we can have enough land to support a substantial home economy. Also, the flexibility of a writing career means that I can be home to spend time with my family, or still have an income if a major disaster happens and we have to bug out.
It’s quite a journey that I’ve set out on. I stumbled onto the path rather accidentally, but have since decided that this is what I want to do—that this is the kind of life I want to live. Your goals will probably look different, based on your own values and desires. If there’s anything about these goals that you find interest, though, I hope you’ll stay for the rest of this blog series where I share some of the more specific aspects of self-sufficiency that I’ve learned and how it all ties in to being a writer.
For various reasons, after a year I decided to come home from overseas and move back to Utah. A lot had changed in that year, and my books were starting to earn enough that I could cover all my publishing expenses and pay myself a small salary. It wasn’t much, but the cost of living in Utah is much cheaper than it is elsewhere in the US, so I figured I’d make it work.
Right away, I started looking for ways to cut my expenses. When you’re self-employed doing what you love to do, cutting expenses is the difference between living the dream and working a dead-end job that you hate. I realized very quickly that one of my biggest expenses was food.
Backtrack a little bit. For most of my life, I’ve been a huge fan of breakfast cereal. In fact, my parents tell me that that was my very first word: “breakfast cereal.” But the thing about breakfast cereal is that it’s expensive. When I graduated college and my dad told me I was financially on my own, I realized very quickly that my cereal habit was making me broke. So I switched to oatmeal.
At first, I bought my oats in tins like this. The price was reasonable, and it lasted much longer than a box of cereal. But then I started shopping at a whole food store, and I realized that oats were much cheaper if you buy them by the pound. Some stuff you don’t want to buy that way, but oats are oats, so it really doesn’t make much of a difference where you buy them. So I switched.
Fast forward to 2013. While browsing through the grocery store looking for ways to cut my food expenses, I found one of these:
A fifty pound bag of anything is prone to give you sticker shock, but when I calculated the price per pound, I realized that the value was almost twice as good as the stuff I was buying at the whole food store. And since I had completely switched to oatmeal by this point, I knew that I would eat it.
I stood there and thought about it, checked the price again and thought some more. Then I threw caution to the winds and loaded the 50 lb bag into my cart.
The great thing about oats is that if you store them right, they will keep for decades. When food goes bad, it’s usually because something else (mold, fungus, bugs, etc) is eating it. That’s all mold is: a really disgusting organism that’s eating your food while it sits there in the fridge. In order to live, these organisms need water and/or oxygen. Since rolled oats are a dry food, if you store them in a sealed container without any oxygen in it, you can keep out the mold and the bugs practically forever.
After I hauled this giant cement-bag sized thing of oats to my third floor apartment, I realized very quickly that I needed to figure out a way to store it. Fortunately, my dad knew exactly what to do. He told me to get some dry ice, put a 1 lb. chunk of it in the bottom of a lidded bucket, and fill up the bucket with oats. Dry ice is carbon dioxide in a solid form, which sublimates (turns to gas) at room temperature. Since carbon dioxide is denser than oxygen, as the ice sublimates it will fill up the bucket from the bottom up, pushing out all of the oxygen. Put the lid on the bucket but leave it partially open, to allow the gas to escape. When you can seal the lid without the bucket starting to bulge, that means the ice has all sublimated and the bucket is ready for long-term storage.
So that’s what I did. I bought a bunch of cheap 3-gallon empty ice cream containers from the BYU Creamery, a small local grocery store owned and operated by BYU. They sell the buckets for $.50 each, so I got five and sealed up four of them after removing the oxygen with the dry ice. I then took the internet for more oatmeal recipes and came across The Oatmeal Artist, where I discovered all sorts of great recipes. Who knew you could do so much with oats?
That was how I got started with food storage. Though I have to backtrack again in order to explain.
I grew up in a devout Mormon household, where we practiced our religion as faithfully as we could. One of those principles is food storage. The idea is that in order to best help others, you first have to help yourself. Self-reliance enables you to provide for yourself and others through times of hardship and trial. By keeping this principle, the Mormon pioneers were able to thrive in a desert wilderness more than a thousand miles from civilization.
Food storage is an important component of self-reliance, not only for the major emergencies like the zombie apocalypse, but for the personal emergencies like declining book sales and a stalled career. If you only buy your food one or two weeks in advance, you’re living hand-to-mouth—literally. If you can learn how to store some of that food long-term, then even if your income streams dry up, you know that you’re still going to eat.
The #1 principle of food storage, though, is to eat what you store and store what you eat. These days, it’s pretty typical in a faithful Mormon household to have a couple buckets of rancid wheat in the basement that no one has opened in decades. We keep food storage because our religion teaches us to, but we don’t really know what to do with it because we never actually eat from it. The principle becomes just another empty practice—another rote tradition.
I knew right from the start that I didn’t want to do it that way. For one, I couldn’t afford to. But as I learned to store food that I actually liked to eat, I found that it reduced my food expenses significantly. Instead of buying oats every couple of weeks, I just gradually ate through what I already had. Since I ate oatmeal every day, and since buying in bulk cost roughly half as much as buying it by the pound, I came out ahead.
From oats, I expanded to other dry foods like rice and beans. Both of those are also easy to store long-term, and a 20 lb bag give you a significantly better value than the smaller bags (especially if you buy it on sale). I also expanded into wheat, which deserves a whole blog post of its own. And later on, I got a slow cooker to help with cooking the beans. If you’ve never cooked beans in a slow cooker, you don’t know what you’re missing. More on that in another post.
The best prices you will ever find for bulk dry goods is at an LDS Home Storage Center. It’s part of the religion, after all—many of the people who work there are volunteers doing missionary service. The last time I went there, it was $10.00 for a 25 lb. bag of oats—that’s only $.40 per pound. Beans, rice, wheat, and pasta is similarly cheap. Most of the Home Storage Centers are located in the western United States, but you can also order the products online. Or if you prefer, you can also find most of this stuff at your local grocery store.
Through food storage alone, I was able to cut my monthly food expenses by 25%. I also had the peace of mind of knowing that I would never have to starve for my art. Even if times get tough, I now have enough of a food security buffer to ride it out.
When I left the United States in 2012, I didn’t have self-reliance in mind. The plan was to break out of the cycle of poverty I’d been living in by starting a career teaching English overseas, bouncing around the world as a global nomad. If I landed a good paying ESL job somewhere like the Persian Gulf, I could come back to the States with a couple hundred thousand dollars and not have to worry about money for a long, long time. And even if I didn’t, I’d still get to see the world.
As a side note, there are quite a few people who do exactly that. While I was overseas, I met a lot of ex-pats who haven’t been back to their home country in years, traveling the world as global nomads picking up jobs wherever they can. While ESL can be something of a dead-end if it’s the only thing you pursue, there are tons of opportunities all over the world to teach English. In a lot of places, all you have to do to find work is show up.
After researching my options, I decided to volunteer with the Teach and Learn with Georgia program. The TLG program was set up by the Ministry of Education of the Republic of Georgia (formerly part of the Soviet Union) to put a native English speaker in every school in the country. I didn’t speak Georgian at all and I didn’t know anything about the country or the people, but they would take just about anybody and pay for my plane tickets up front. After getting a year of ESL experience, I could get a free ticket basically anywhere in the world—exactly the kind of launching pad that I’d been looking for.
That was the plan anyway. Like most plans, however, it fell apart and turned into something completely different. Instead of launching an ESL career, I learned that I really had no interest teaching English. I did, however, learn quite a lot about self-sufficiency.
Georgia is an interesting country. It’s got a population of about 5 million, with a little over a million people living in the capital and largest city, Tbilisi. The rest are basically scattered across the countryside in towns and villages. Kutais is the second largest city, but it’s really just a very big village with a quaint European town in the center. Yes, people live in fifty year-old communist-era apartments (“Krushchevkas”), but they still kept chickens and livestock in the yard, and usually had a grandparent or two still living in one of the outlying villages who tended to the family land.
For five months, I lived in the Avtokarkhana district in Kutaisi with a local family. After the summer, I spent another four months in Rokhi, a small village between Kutaisi and Vani, at a farmhouse owned by the math teacher at the village school.
I learned a lot of unexpected lessons from my time in Georgia, many of which I’m still parsing through. The two biggest ones that set me on a course of self-sufficiency are this:
Lesson 1: What a collapsed society looks like.
Contemporary Georgia is not a collapsed society. They’re actually growing pretty well, with a large influx of foreign investment and all sorts of recent improvements (including a new police force that makes it one of the safest countries to visit in all of Europe). But in the nineties, the country suffered a major socio-economic collapse, resulting in a civil war and the secession of three separatist regions: Adjara, Abkhazia, and South Ossetia.
All around me, I saw signs of that collapse. Most of the basic infrastructure was built during the communist era, and most of it was dilapidated or barely functional. In Kutaisi, we saved our plastic water bottles and kept them full for times when the water went out (which happened frequently in the summer). In the village, power outages happened almost daily, sometimes forcing me to go to bed at 7:00 pm just because it was too dark to do anything else.
Of course, there was a lot that had survived the collapse. In some places, people probably hardly noticed that a collapse had happened at all. A collapse does not hit all people equally, and there’s a very big difference between the collapse itself and people’s experience of it. The old women who grew up under communism had mostly fond memories of that time and wished that they could return to it. Everyone else’s attitude toward that was basically “hell, no!”
When I came back to the United States, something very strange and disturbing happened. I started to notice ways in which our own society is starting to slide toward the same state of collapse that the people in Georgia are currently pulling themselves out of. Our infrastructure is not as dilapidated as Georgia’s, but give it another ten years and it will be. In some sectors, most notably the state-run sectors like Amtrak, it already is.
We may have won the Cold War, but that doesn’t prove that our socio-economic system works. All it proved was that the Soviets collapsed faster. Our modern American society is not immune from collapse.
Lesson 2: What a home economy looks like.
According to the Merriam-Webster dictionary, an economy is “the process or system by which goods and services are produced, sold, and bought in a country or region.” A home economy, then, is the system by which goods and services are produced, sold, and bought within the home. If your home does not produce anything, you do not have a home economy.
As a volunteer, I received a 500 GEL (approximately $300) stipend each month from the Ministry of Education. This was actually more than the base salary for most Georgian school teachers at the time. Georgia is a poor country, but living expenses are certainly much higher than $300 a month—especially for a family. How, then, did school teachers manage to get by?
They had a home economy.
This was especially true in the village. We kept chickens, cows, sheep, and pigs, made our own cheese, grew our own grapes, made our own wine, etc etc. We had our own well, kept a large garden, went hunting when the weather was good, and baked most of our own bread. More than half of what we ate was easily produced right there on our own farm. And because we had a couple of fairly large vineyard, when grapes were in season, we loaded up the back of a truck and sold them at the market in Kutaisi.
For someone who grew up in a middle-class American suburb, this was absolutely fascinating. Most people here in the States do not have a home economy because they do not produce anything. They do not keep a garden, grow their own food, or do much of anything else that would be useful if the US dollar were suddenly to collapse. The only way most people can support themselves is to earn an income outside of the home—that, or go into debt. For almost half of the US population, an unexpected $400 expense would force them to either beg, borrow, or steal.
I have no idea what the personal finances looked like for the family I stayed with, but I know that if all of the outside income dried up, we would still have food on the table. Why? Because we grew it. We grew a lot of it, in fact—enough that we could probably barter for what we didn’t grow. It was hard work living that sort of lifestyle, but it brings a sense of security—real security—that you cannot get in any other way.
More than anything else I saw or experienced, this self-sufficient lifestyle had the greatest impact on me. By the time I was ready to come home, I was already thinking about how I would implement it in my own life. I had learned that true economic security comes not from the government, your job, or society at large, but from living in such a way that you can provide for your own needs and wants—from living a self-sufficient lifestyle. And that’s what I set out to do.
Before I graduated from college five years ago, I decided that I was going to pursue writing as a full-time career. That was my dream: to make a living telling stories that I love.
It’s been a crazy ride so far, and I don’t doubt that it’s only going to get crazier. For the better part of a year now, I’ve managed to live that dream, but a changing book market combined with a shift to writing longer books has made for rocky times ahead. That’s just the way things go when you’re self-employed: you never know how much you’re going to make each year, or when your income streams are going to dry up unexpectedly.
As a career writer, there are a lot of other economic challenges I expect to face. Health insurance, for example: the current system here in the US is completely slanted against self-employed people, especially those who don’t want to be totally dependent on the government. Without a steady paycheck, I also expect that I won’t be able to get a traditional mortgage. And self-employment taxes… don’t even get me started.
Point is, it’s tough to make a living as a career writer—and that’s without taking into account how anyone actually makes any money at it. It’s an oft repeated truth in the entertainment industry that no one knows anything, and that’s true of books more than any other segment. No one knows why some books flop and others take off, which can be really frustrating when your ability to make a living depends on that.
Fortunately, there are two sides to the “make a living” equation. It’s not just about building your income streams, it’s also about reducing your expenses. So long as the money flowing in is greater than or equal to the money flowing out, you’re in the black.
Over the past five years, I’ve come to realize that the best security I can ever hope to have comes from learning to live a self-sufficient lifestyle. That means learning how to make, store, and ideally grow my own food, how to fix, reuse, or re-purpose things that are old or broken, and how to DIY as much as reasonably possible. Basically, I’ve learned how to be something of an urban homesteader, insulating myself from economic shocks through developing the skills of self-sufficiency.
It’s been an ongoing process, and I still have a lot to learn. At the same time, though, I’ve managed to cut my expenses fairly significantly, living on just four-figures with little or no debt and still managing to put aside a little each month into savings. I’ve also learned how to eat really well on food that I’ve grown myself, which beats anything you can buy in the store. So while I’m not yet an expert, I do think I’ve learned a few things that are worth sharing.
Over the next couple of months, I plan to write a few blog posts where I share my experiences and explain what I’ve learned. If you’re an aspiring writer like I was five years ago and you want to learn how to make it, or if you’re just someone who’s interested in becoming more self-sufficient in general, I hope you’ll find this blog series interesting and informative. And if you’re already an enthusiast for self-reliant lifestyles, feel free to stick around and share your own experiences! I’m definitely interested in hearing what you guys have to say.
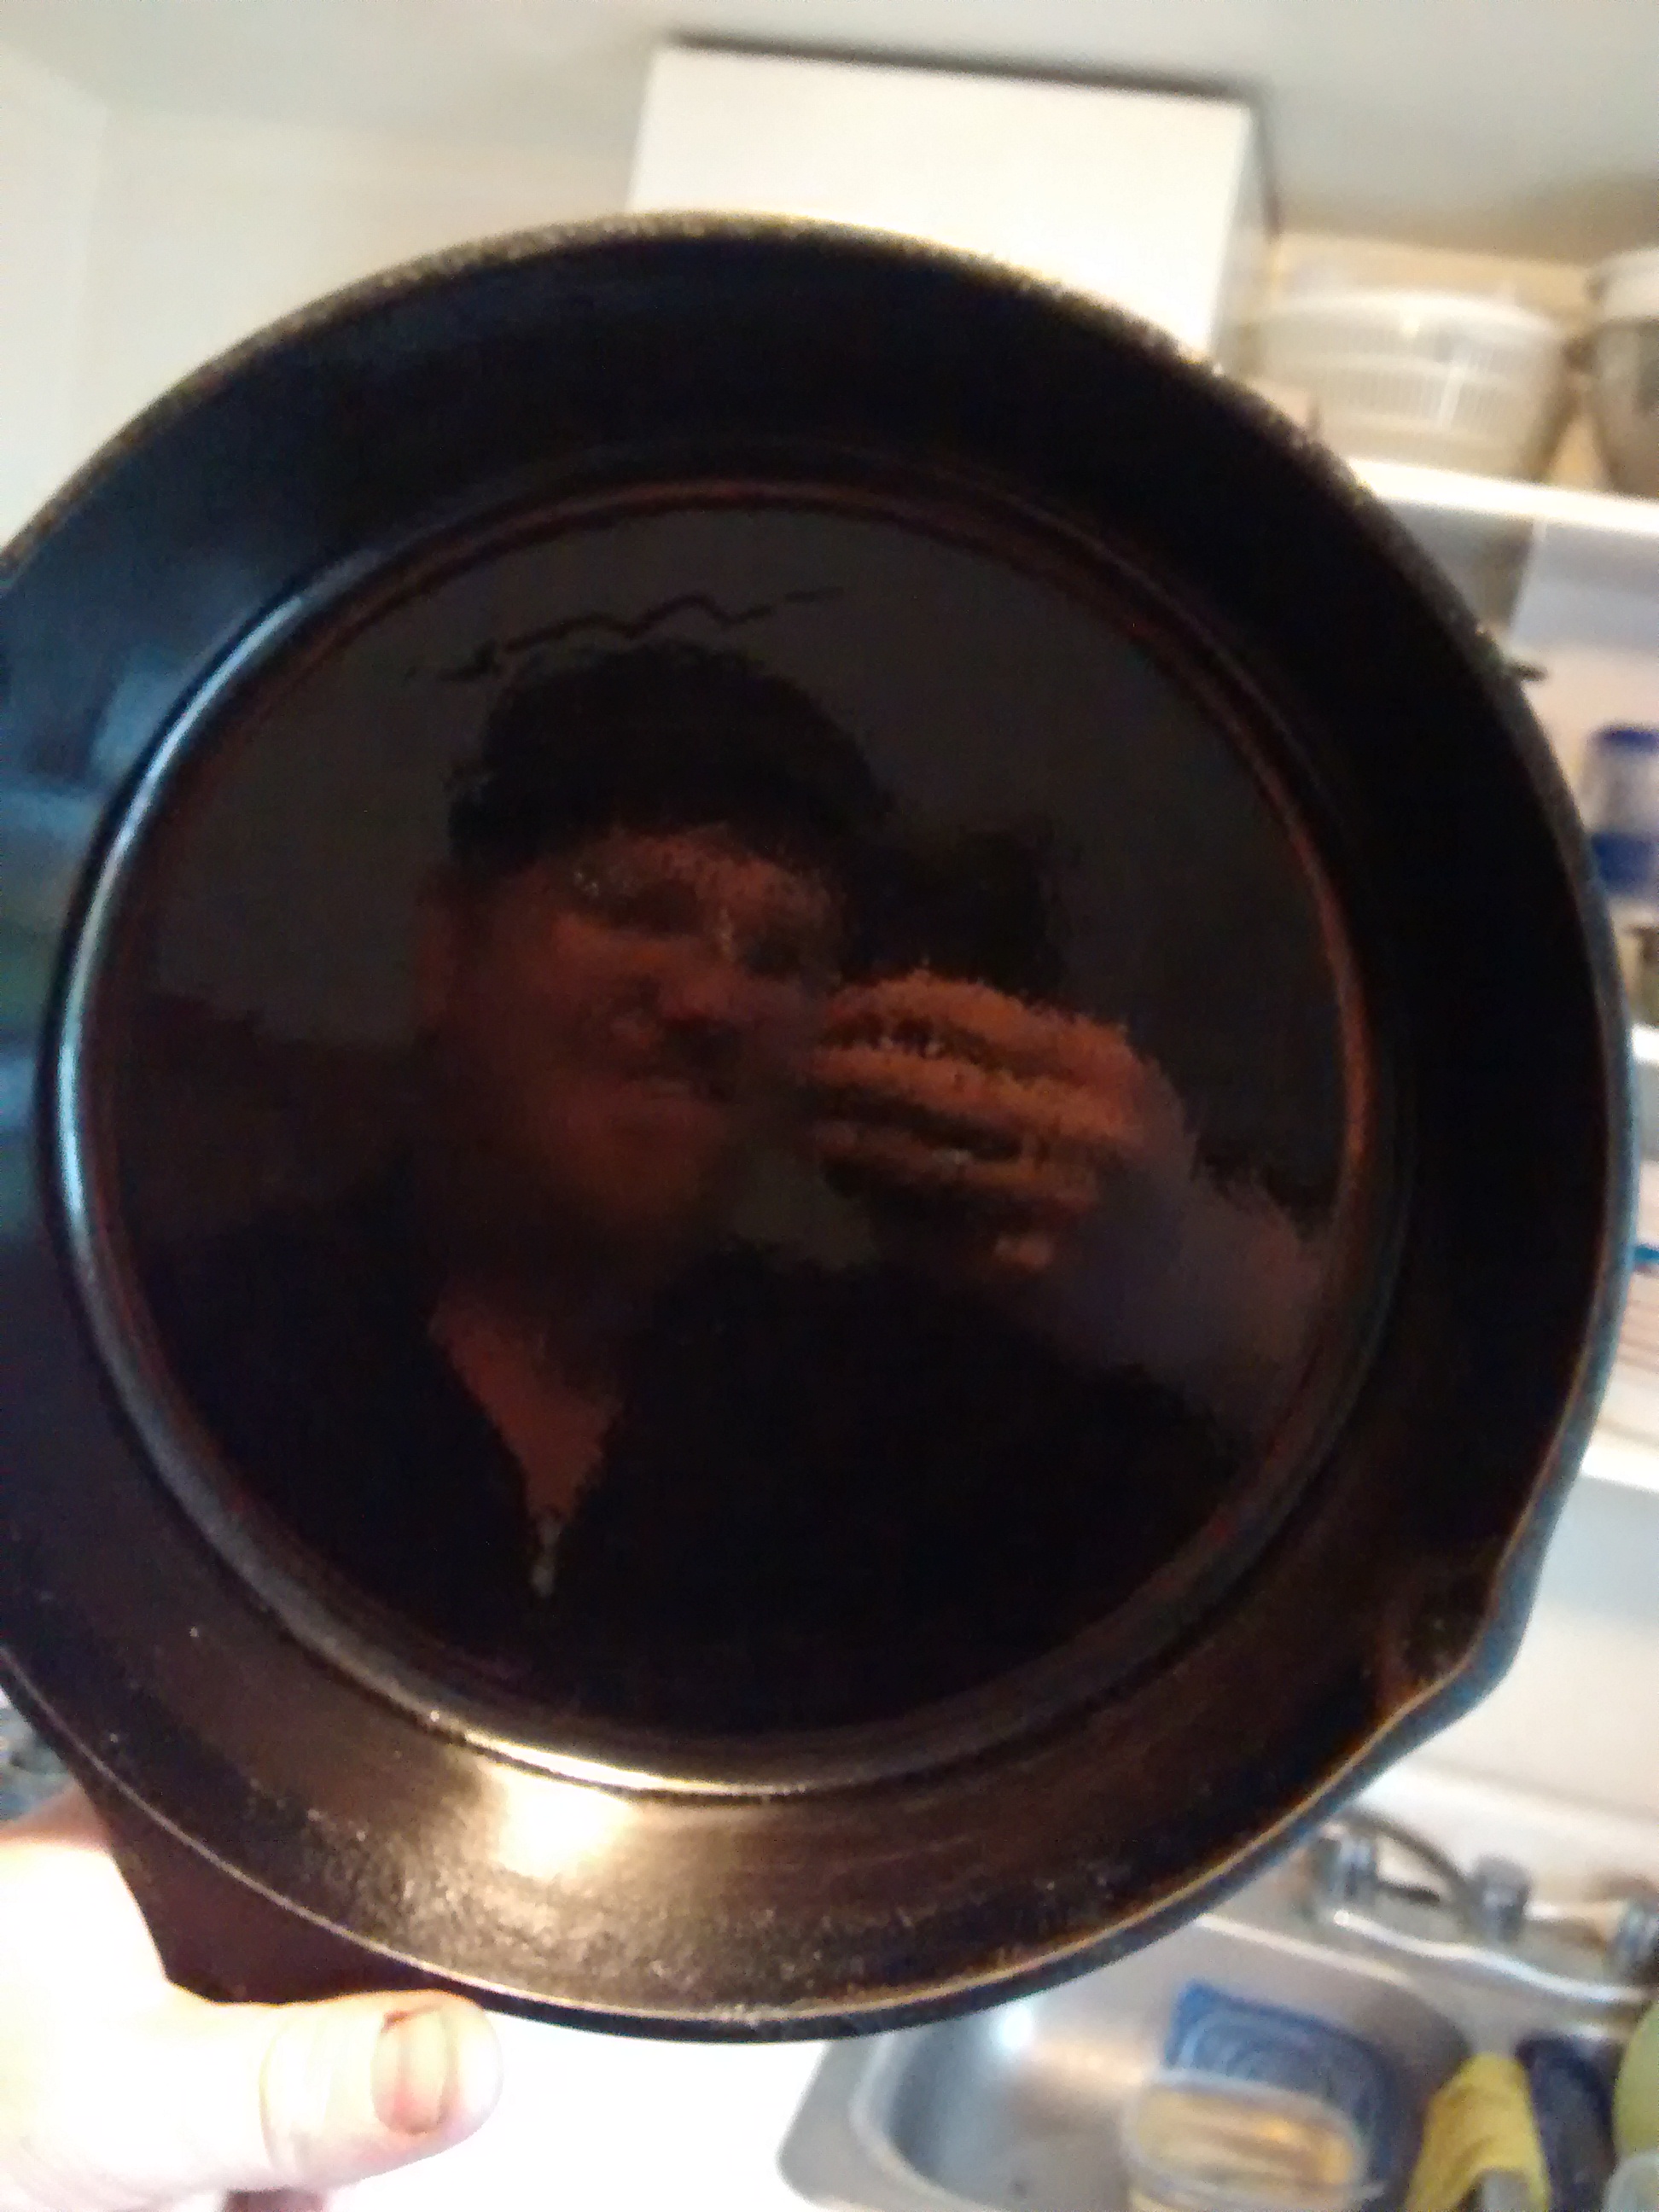 The non-stick properties of cast-iron are particularly remarkable. This is a selfie that I took off of the bottom of my cast-iron pan shortly after cooking with it. After rinsing off the excess food with water and seasoning it with a touch of olive oil, it’s as shiny and clean as a mirror—literally! The reflection is so good, I could use it to shave.
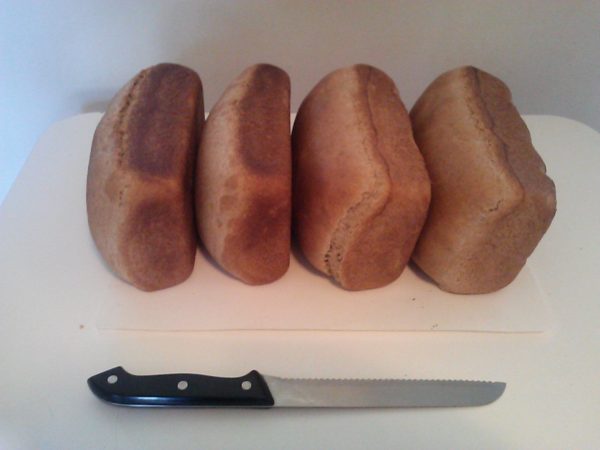


 So that is the kind of self-sufficient lifestyle that I personally want to live. As you can probably tell, family is one of the main themes running through everything. I’m single right now, but I do want to have a family of my own and that’s what I’m working towards.
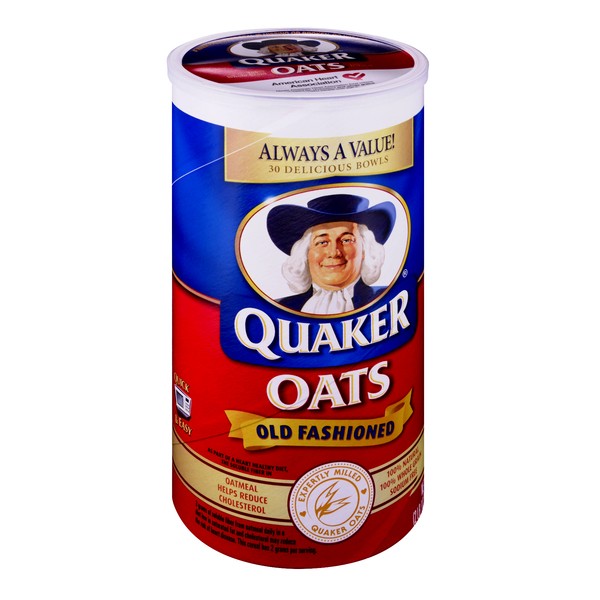 At first, I bought my oats in tins like this. The price was reasonable, and it lasted much longer than a box of cereal. But then I started shopping at a whole food store, and I realized that oats were much cheaper if you buy them by the pound. Some stuff you don’t want to buy that way, but oats are oats, so it really doesn’t make much of a difference where you buy them. So I switched.
 A fifty pound bag of anything is prone to give you sticker shock, but when I calculated the price per pound, I realized that the value was almost twice as good as the stuff I was buying at the whole food store. And since I had completely switched to oatmeal by this point, I knew that I would eat it.